Today, 12-7-2008, was set aside for block clean and prep.
The Callies billet splayed mains and stock caps are set aside in
order. |

A little bit of oil hole widening to better fit the oil holes in
the Clevite bearings. |

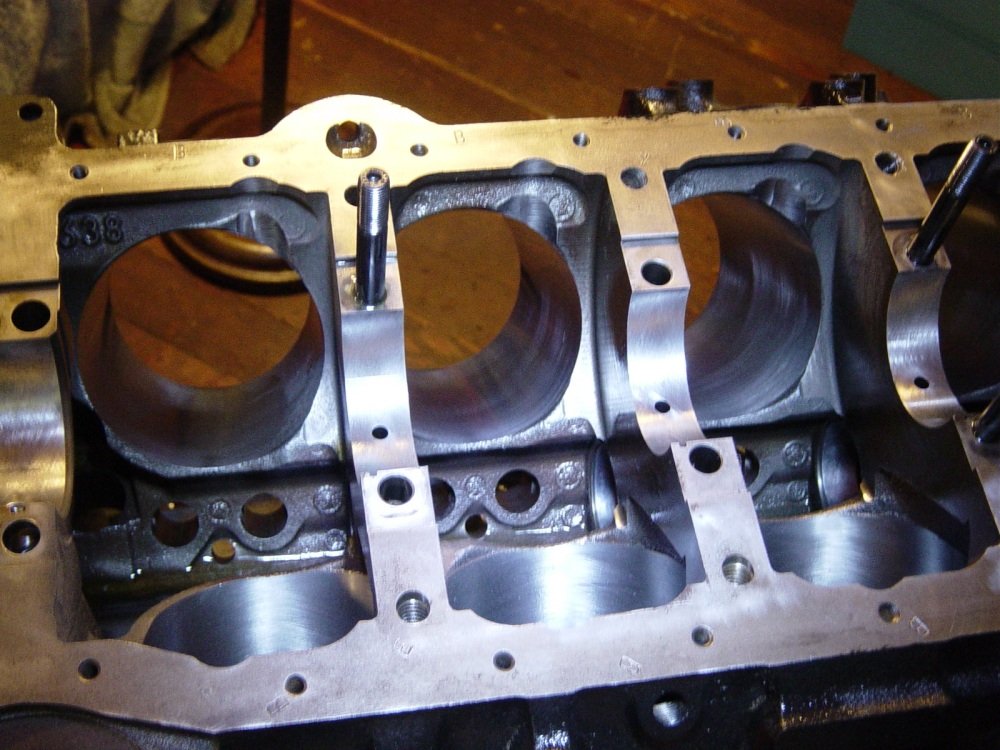
McKeown Motorsports machined the block and clearance for
rods. I widened the area just a little. |

I took numerous photos but my old Sony camera, (or my eyes), are
going bad. Only a few came out in focus. This pose
shows some of the rod clearancing at the bottom of the cylinder
bores. |

And a better view of the block clearancing. |
The block was then
cleaned and oiled and now it's ready for cam bearings, freeze
plugs, oil galley plugs. Then the crank, pistons, rods,
heads, etc. |

Block is clean and ready for Dura-Bond cam bearings. |

I hammer them into place with this cam bearing installation tool. |

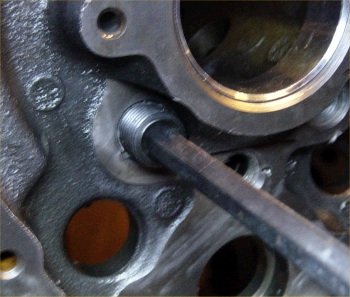
Here is a photo of the empty hole where a steel ball or soft core
plug would be installed. This is under the rear main
cap. |

Here is the plug pressed-in. If this plug is not installed
then the oil filter will be bypassed and you'll have more oil
pressure, (you will not have "no" oil pressures). |
Threading in the front oil gallery plugs. I use 1/2" pipe and
1/4" pipe taps.
|

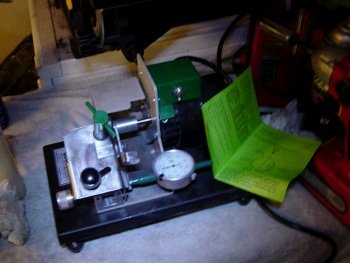
Now measuring for main bearing clearance. Standard sized
Clevite H-series are at #5, 4, 3, 2 and .001" under-size is
at the #1 main cap. Clearance is .0025", .0027",
.0030", .0030", .0035" from front to back. |

Crank is in and thrust is .007" |

The Callies Compstar crankshaft spins very nicely in it's new
home. |

Now it's time to measure all the rods for bearing clearance.
The Compstar crankshaft usually has rod journals a tad smaller
than stock. This is at 2.0990" |

With the ACL bearings supplied by Callies for this
Crank/Rod/Piston/Bearing kit, they measure .0030"
clearance. Too much for me. I went to my supply of
Clevite H-series rod bearings and mixed .001" under and std
size and have from .0022" to .0025" clearance. |

Then the Mahle piston gets a soap and water cleaning and WD40
oiling and..... |

Assembly with Compstar rod and Mahle piston with 116g pin and 1g
wire lock. |

I put the oil rings on each piston and then installed the
rod/piston assembly onto the crank. This is the 1st check
for rod to block clearance. #2 rod bumps the block.
All the rest are ok but could use a bit more clearance. |

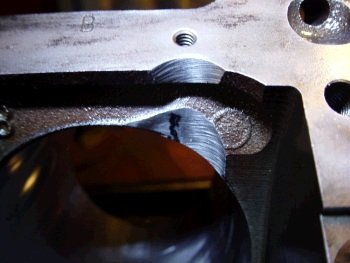
The only photo I have. This is #2 rod bumping the
block. The block will now get more clearance and then a
final cleaning. |

Bottom end back out so that I can grind on the block a little bit. |
I marked the spot that needs a little more clearance. |

After grinding-before cleaning. |

After grinding and cleaning. |

I have the block ready for rings. Super clean bores.
Wiped numerous times. the 19/23 mark on the block is the
ring gap feeler-gauge. |
Fuzzy photo. Rings were gapped .020"/.024" 1st/2nd. |

Empty bores after cleaning. |

Rings stored in their bore after file fitting. Last photo
prior to dead batteries in camera. |

Here is the Advanced Induction camshaft. Their cams are
always on a billet core and the oil pump gear is
"ever-wear" (compatible with the LT1 iron gear). |
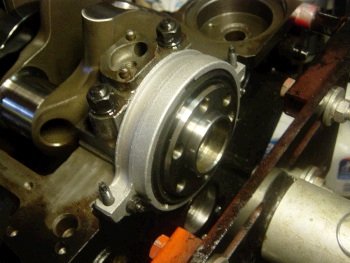
The new from GM rear main seal housing. All ERE motors
receive a brand new from GM rear main seal housing. |

The rings were filed earlier today. |

ARP 4.030" piston ring compressor. |

Soft tap. |

The Compstar rods from Callies clear almost every camshaft without
further modification. |
Rod side clearance is .018" to .019" All rod
bolts torqued to 75ft-lb with the supplied grease from Callies. |

fuzzy photo of the rod bolt to block clearance. |

All rod/piston combos installed and torqued. Piston deck
height not measured yet. |

Dip stick tube needs to bend a little bit over the splayed main
cap. |
Another view of the slight bend required of the dip stick tube. |

Melling 10552 10% HV, 70psig pink spring oil pump. |
Bolt on pick-up. This one is the 7.5" version. |

Pan on temporarily to make sure rods do not bump. |

It's almost a complete shortblock. |

Still need to install the timing set, timing cover, heads, etc. |

Block deck surface is cleaned with brake-clean to make ready for
head gasket and heads. No oil or finger prints allowed. |

The FelPro 1074 head gasket at .039" thick. The pistons
are all .004" down in the hole. |

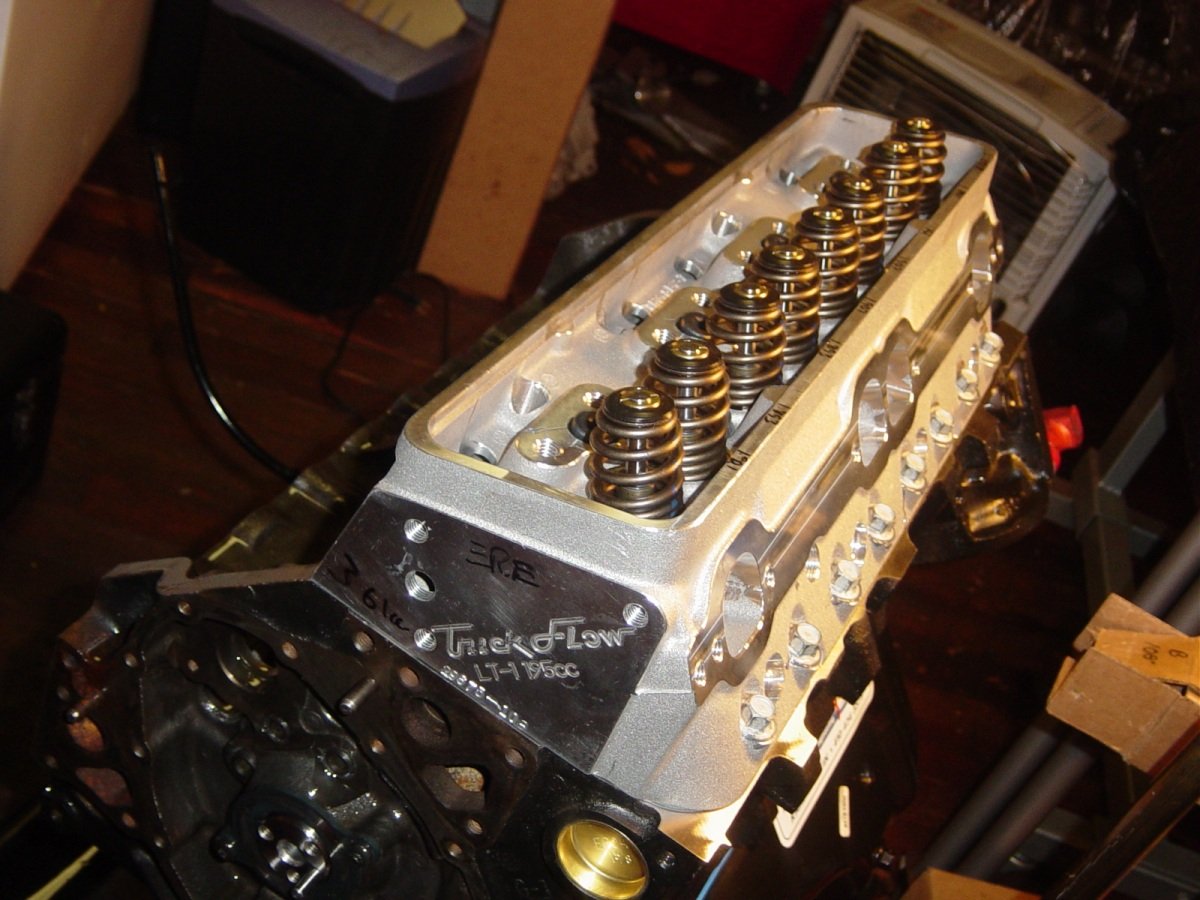
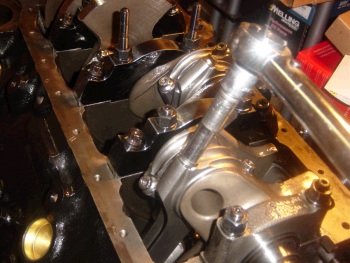
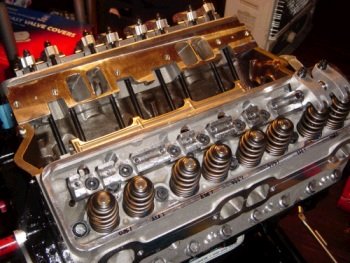
The un-surpassed Ai CNC ported TFS LT1 head. |

Both heads bolted on with stock GM head bolts temporarily.
The ARP head bolt kit is still in the mail. |

I need to get the heads on and the valve train mocked up at least
a few days before engine delivery. The pushrods are the last
thing to order. I need 7.100" pushrods and Ai is
shipping those on Tuesday. |

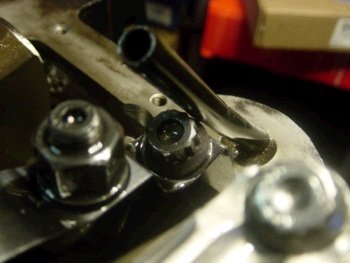
The rocker tip rides the valve tip a bit too far outboard.
This is with the supplied Jesel .100" shaft stand shim.
Ai provides me with .050" shims with every box of shaft
rockers and it looks like I'll need the .050" shims.
The .050" shim should lower the stand and the rocker should
move back a little bit and ride the valve tip at the exact center. |

I'm trying out a new-to-me billet timing set. It's the
Cloyes 9-3545X9 |
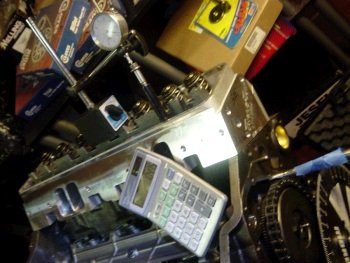
The cam degree came
out pretty close to the cam card. Phil at Ai says to install the
cam from 104 to 106 ICL and it's at 106 right now. Just a
few more things to do and the motor will be delivered to Nabil
Guffey's shop for installation into Mike Lopez's Impala SS |

Going to a mechanical water pump. A water pump drive gear is
going to be used and so the traditional double roller timing set
cannot be use. Here is a GMPP LT4 Extreme timing set. |
I need a water pump drive gear. I do not think you can get
one of these new, (I have not found it for sale anywhere).
Here is a used gear pulled from an engine core. It feels a
bit worn out and so I'll have Nabil Guffey check his supply for
me. |

A quick test-fit of the GMPP LT4 extreme timing set, (without
water pump drive gear). |
I wanted to see if it would be close to the cam card. A
happy surprise. This timing set comes in at 105 ICL, (cam
card calls for 104 to 106 deg. ICL). |

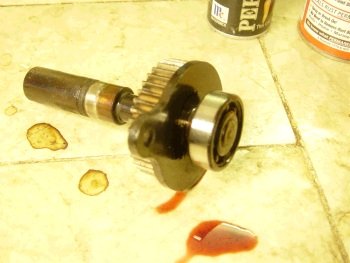
GMPP LT4 extreme water pump gear on the left needs to press onto
the stock drive gear. |

Here it is after pressing the old one off and the new one on. |

LT4 Extreme timing set. |

ARP head bolts. |

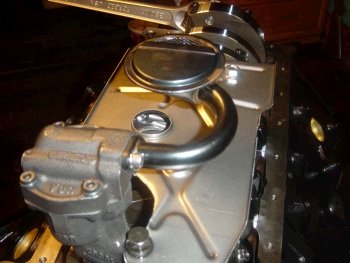
Timing cover on. Final look at the bottom end. . . . . . |

and check of rod clearance. . . . |

Prior to oil pan installation. |

Now the block has a coating of POR-15 engine black. |

It's delivery day 12-19-2008: A few final items to-do prior
to loading in the truck...finish installing pushrods and rockers,
test the oil pump and pre-lube the engine, install the rear
freeze-plugs, install the ATI crank hub and flexplate, truck to
Nabil Guffey. |
I took out the .100" rocker shaft shims and installed the
.050" shims. Jesel shaft rockers get installed 2 at a
time. With the 7.100" 3/8" pushrods the lifters
are at zero pre-load as soon as you bolt the rockers on. Then 1/2
turn more on the adjuster and the lifters are pre-loaded. |

A photo of the front of the motor with the ATI Corvette hub
installed. |

The lifters used in ERE27 are GMPP hydraulic. They pump up with
oil nicely and send the oil up the pushrods and on top of the
Jesel rockers after about 15 min of oil pre-lube. |

Every lifter must show evidence of working properly. That
evidence is oil out the top of the pushrod and dribbling down onto
the valve spring. If no oil then possibly the lifter or
pushrod is clogged. Once I found a bad lifter in a motor
rebuild when it let too much oil up the pushrod. |

Every rocker has oil on it from the pre-lube test. |

I left off the ProForm Chrome valve covers so as to minimize the
chance of scratching them. Here is where I press in the rear
freeze plugs and then torque on the ATI flexplate. |
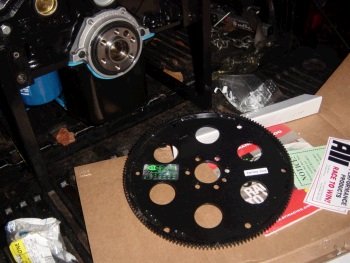
ATI accidentally sent a BBC flexplate a few days ago, (in the SBC
box), and so I just received the correct one today. Here it
is. |

Stock GM flexplate bolts with blue Loctite and at 85ft-lb |
Nabil Guffey now has
the motor and after the great snow storm of December 2008 Mike
will drive his car down for the big swap. |