ERE 383 #74
Forged bottom 383 shortblock with
Forged SCAT crank, Callies Compstar 6" H-beam Rods,
Mahle pistons with 1mm rings,
4-bolt Steel splayed main caps
and assembly of long block with LE TFS heads Pay no attention to the name on the bearing box...
At the beginning of almost every motor project is the rotating
assembly gram weight measurements for crankshaft balance. I use
a small gram scale and professional 3-beam scale. Why two
scales?
That is to make sure both read the same. It's a QC double check.
Here is the Compstar rod on the gram scale.
This is the Mahle -5cc flat top piston. 421g.
The Mahle 1mm rings are extra light. This is the lightest ring
package I have seen.
After weighing components individually (for the records) I weigh them
as a set and compare the numbers, (as another form of quality control
check).
See the "Total on scale" is dead-nuts-on with the individual
sum. The crank bobweight is going to be 1720.6 (6g for oil)
The quality of the Mahle is un-matched.
This is a light duty pin. A big blower motor would do best
with a thick and heavy pin.
Crankshaft arrived a few days ago from the balance shop.
The main and rod journals were also polished.
This is a forged SCAT, 3.75" stroke, external balance to
1720.6g
Rod journals at 2.0995" for the log-book.
Mains at 2.4486 to 2.4488"
Here is the fully machined block from Golen with ProGram main caps
I set the the crank on the King main bearings to make sure nothing
was out of whack prior to setting main bearing clearance.
I used a mix of X and standard main bearings in order to get
.020", .020", .022", .020", .027" from 1 to
5, (forward to back main caps). Thrust bearing is .003" by
feeler gauge and then .006" by dial bore gauge. The photo
above is the piston/rods being stored in their bores. Next on
the agenda is to file the rings.
My favorite shelf piston: The Mahle 930200630 with the 1mm
ring pack.
Prior to filing rings I double check a few
things. The piston to cylinder wall clearance is .004",
(.0035" is minimum recommended). Since I do not do the
machine work I simply double check that the bores are consistent and
at 4.030" (sometimes I have them set at 4.031). One
way to double check bore size is to zero out my gauge on the
4.030" standard and compare each bore. Here I have
4.030" plug or minus .0005". (it will be a bit out of
round without the head on. Another way to verify the bore size
is the simple piston to bore clearance. All is good here.
Time for ring gap decision....
I went with .023" top ring, (some nitrous).
And to the right you see the 2nd (oil scraper) ring at
.020". Mahle recommends tighter 2nd ring when using nitrous
to maximize the oil scraping.
These are the state-of-the-art 1mm rings. They conform to
bore distortions better than the old-school thick rings.
Here is the LE camshaft with camcard.
Oil galleys threaded and plugged.
The best of the best Cloyes extreme timing set.
Rod bearings are the King CR807HP. All standard size gave
.0022 the .0023" which is quite within the desired clearance for
the Callies Compstar rod.
Inserting pistons with extreme caution. The rings are tricky
and require an experience hand.
Here is a .022" feeler to brace the rods when torqed to
75ft-lb. (Rod side clearance is .022").
All pistons installed. The pistons are from .002 to
.003" out of the hole.
Crower hydraulic lifters, (stock style). These are my
favorite due to being 100% factory bleed tested. Many of the GM
LS7 lifters have failed on me in one manner or another. These
are always perfect. A bit more expensive but worth it.
Head gaskets are the premium FelPro #1074 at 0.039"
compressed thickness which gives .039" - .003" = .036"
quench.
To the right is the unwrapping of the billet rail Stef's oil pan
custom made for Ellwein Engines.
Lloyd Elliott TFS heads.
ARP head bolts fresh out of the parts cleaner and with thread
sealant applied.
The bolt head and washer receives ARP thread lube.
Head on and ARP head bolts torqued to 70ft-lb
A few close-ups of the LE heads
The Cloyes timing set comes with a replacement gear for the water
pump drive gear. I pressed out the old stock gear and installed
this. It has a different tooth pitch to mesh better with the cam
sprocket.
Camshaft degree check: As installed dot-to-dot with the
crank sprocket at "0" I get 107 deg intake centerline.
The cam card shows 108 deg. This is as close as I can get it,
(within 2 degrees).
Rocker tip to valve tip check with 7.200" Manley
pushrods. Pretty close.
Most of the rocker pairs are nicely centered on the valve tips but
a few are not. That is a function of the slight slop in the
pushrod guide plates when bolting them down. I marked the nicely
aligned rocker pairs with a yellow marker. The others need to be
adjusted.
Now to the underside of the motor and fitting up the oil pump and
oil pan. Here is my photo verification of the oil galley plug
under the main thrust cap.
O A Stef's oil pan requires a non-stock pickup. Luckily I had
one in stock. Stef's makes these for me.
Pan to pickup clearance at around 3/8".
The pan is only on for a test fit.
I'm looking for rod or crank interference (prior to final
installation). All is good. The rotating assembly turns
without drama. Still to do: Install windage tray and oil dip
stick tube. Add oil and turn the oil pump with electric drill to
check oil pressure and oil to the pushrods/rockers/lifters.
Install dyno intake manifold and distributor then take to engine dyno
for a shake down.
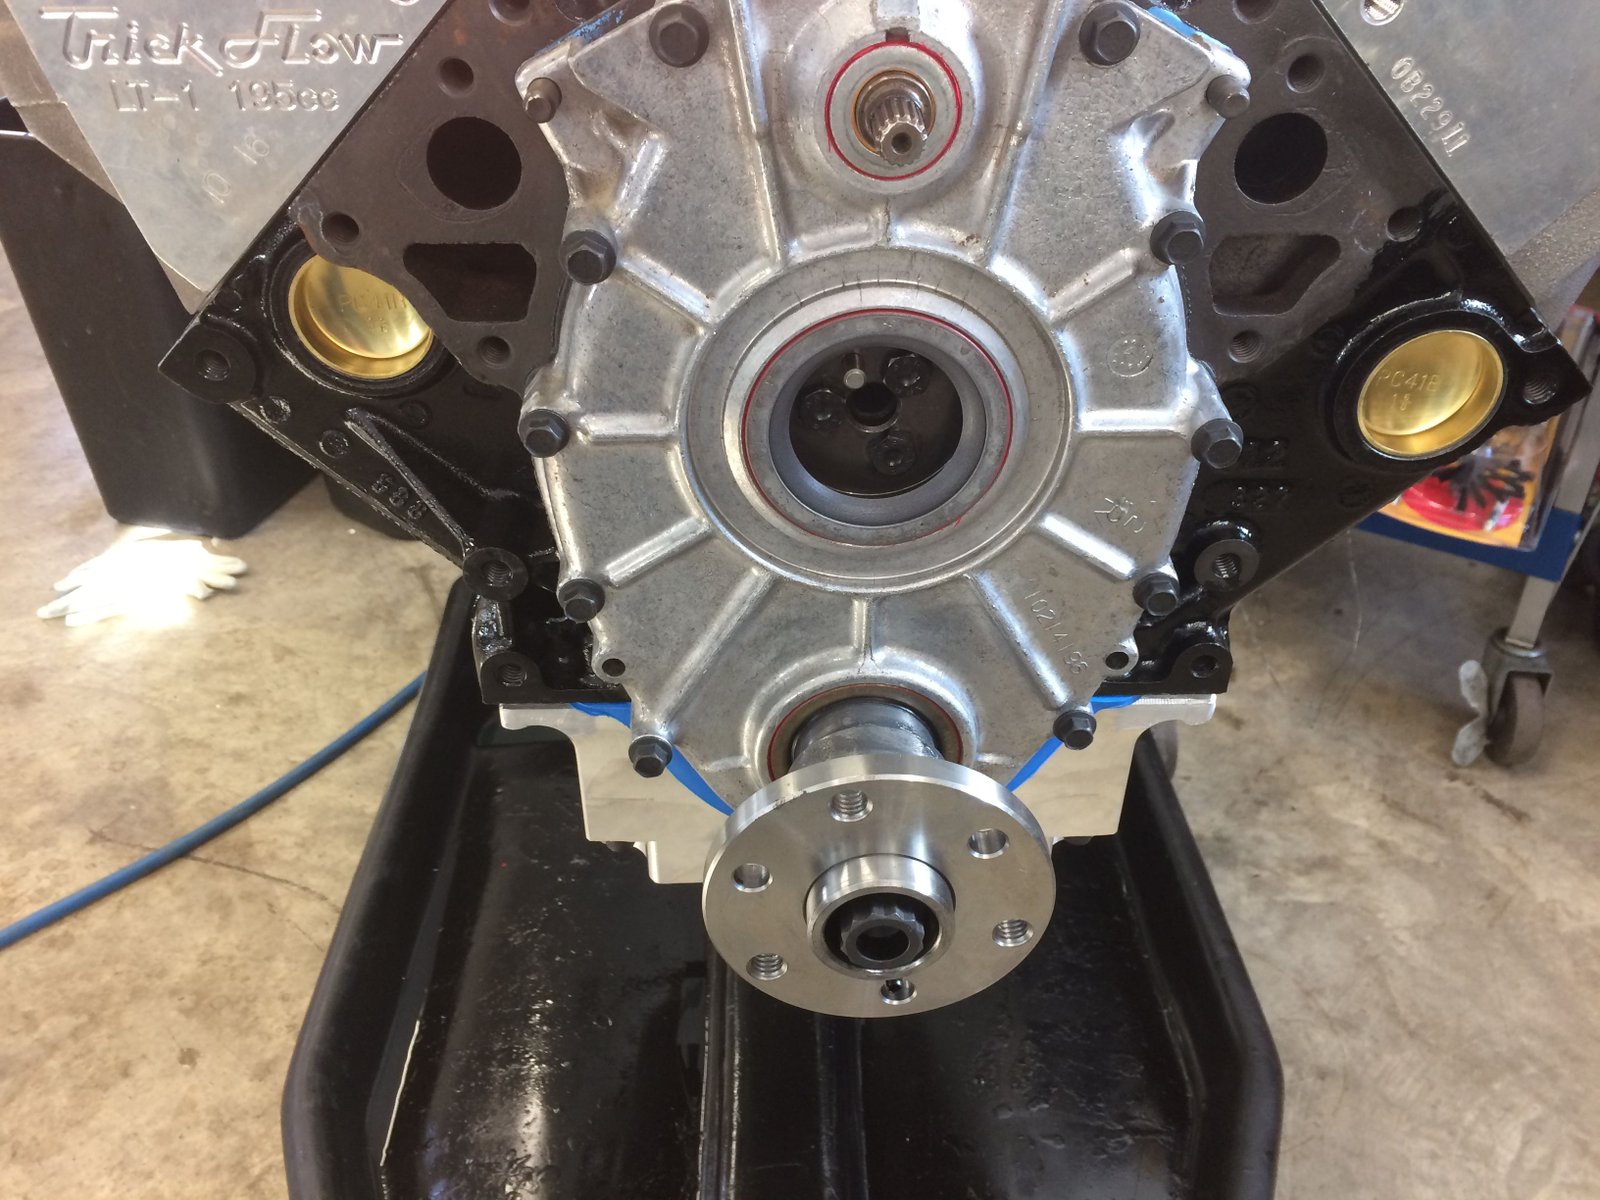
Cleaned up stock timing cover with new seals.
Jeg's hub and ARP crankshaft bolt.
Cleaned up stock windage tray installed and slightly clearanced
for rods.
This is a cleaned up core windage tray. I drill a larger
hole for for dip stick and most important...I make sure there are no
metal edges that could flake off down the road. I use a short
head stud for the oil pump stud and I place a few washers under the
windage tray which gives me more clearance for the rods.
Now I'm getting ready to press up the oil system with an electric
drill to check for feel/sound/pressure/leaks.
5 quarts of straight 30W oil is used. This oil will stay in
and be used on the dyno.
60-62psig.
Takes a while, (5 min), but finally all rockers have oil.
Dyno carburetor manifold and distributor.
I plugged the front of the timing cover
with an old optispark. The rear distributor will need to be set
at about 36deg BTDC (#1 cylinder). Then off we go to the dyno.
Ready for the engine dyno.
Notice the timing marks on the stock style damper.
This is the dressing for a dyno session. I use an electric
water pump and Holley 750cfm carburetor. The carb allows me to
run any motor without spending a day tuning the EFI. These are
not tuning session they are motor run-in sessions.
I do plan on having an easy EFI system set up one day to allow for
use of a stock LT1 intake manifold. I'll probably interface the
TorqHead system with LS1 PCM.
The dyno control room with last customer's info (ERE72). The
thermocouples show 47F. It's a bit cold.
Here is a good view post-dyno. The exhaust ports are free of
oil.
This will be a fun street motor and quiet and easy on the
valve-train. Good for engine longevity.
The motor had a shipping
mishap and thus was tore-down and reassembled and re-tested. For
some reason it made more power. Maybe just wearing in.
Maybe a bit more spark timing?


 O
O