|
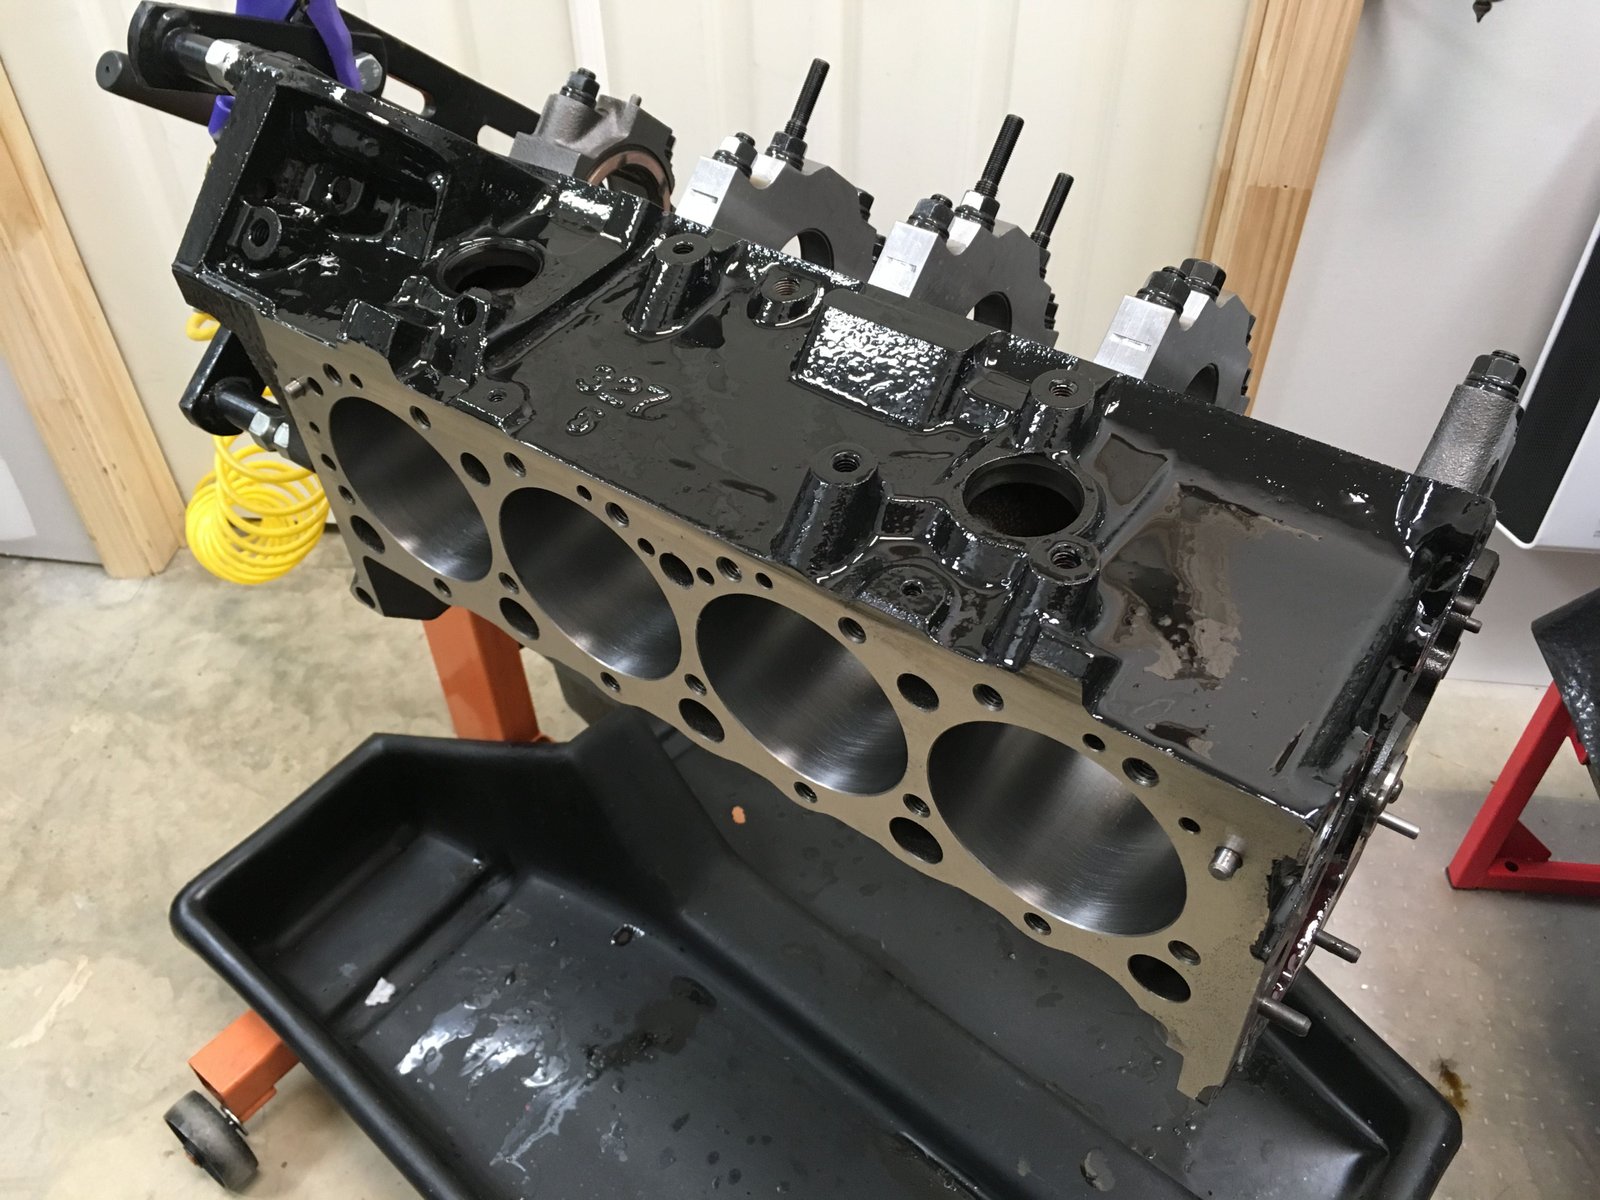
The photo to the left
shows the area of the block that needs to be clearanced to allow
oil drain back from the head gasket. The MLS and the FelPro
1074 can bennefit from clearancing in this spot.

The block being used in this build is fitted with premium
ProGram splayed main caps with ARP main studs. |

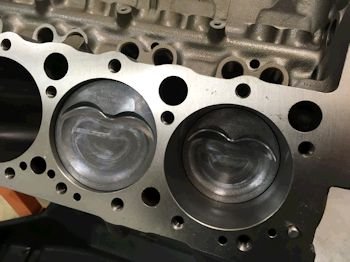
Block cleaned up and if you look closely you'll see the spot on
the deck that was clearanced for the head gasket.
|

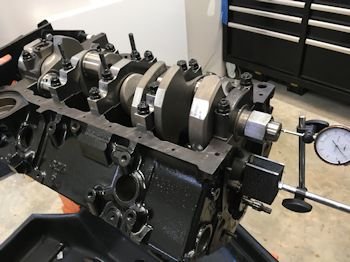
Now I'll be test fitting the rotating assembly to make sure
the rods clear the block. The forged Eagle crank looks nice. |

Rod bolts clear the block.
|
4 piston/rod sets are in and so far so goo. |

Another photo.
|

All rod/piston combos installed and all clears. |

Now measuring main bearing clearance. The main studs are
torqued to 80ft-lb with Clevite MS909H premium bearings. The
thrust (#5) is good at .0030". The rest ended up being
.0018 to .0020"
|

Cam bearings installed and now some PRO-15 Engine black paint. |

The Cloyes extreme timing set comes with a new water pump
gear. You have to have a good core and swap the gears.
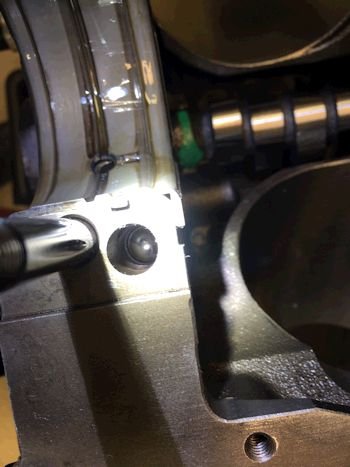
|

Here you can see the oil galley plugs with weep oil
holes. These are for Big Block Chevy but work well on the
LT1. |
|
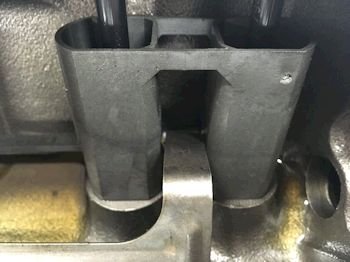
The photo to the left
is for my records. I always make sure to take a photo of the
oil galley plug under the rear main cap. This gives me peace
of mind to know that I did not forget to install it.
Thrust is .006" |

Timing set installed at zero
|

1st degree check comes up with 107 intake centerline using the
"guess the top of the lobe" method. |

Next check comes up with 108.5 degrees intake centerline using
the mark before and mark after method.
|
Cam card shows 108
deg. as intake centerline. Within 1 degree is good. |

Rings file fitted for hot street use, (no nitrous). Top ring
at .019" and 2nd ring at .017"
|
 |

All rods/pistons installed and rod bolts torqued to 65ft-lb.
|
 |

Rod side clearance is at .022"
|

Piston is .015" in the hole. I have my blocks decked as
little as possible. This one is at 9.015" |

CNC ported Advanced Induction cylinder heads.
|

These are from the GM LT1 core. |

Head bolts torqued to 70ft-lb.
|
 |

Test fitting of oil pan.
|
 |

Now fitting up the oil dip stick tube and stick. It has to
be modified to allow the stick to pass by the big splayed main cap.
|

The windage tray needs to be trimmed to allow the stick to
pass through. |

The pickup is a bit lower than 7.5" This is a Melling
M155 oil pump with press-on pickup.
|

Oil pan on and crank turned to make sure the rods and crank
clear. |

|

Crower lifters getting a pre-soak |

Rear of the motor with the plugs and crank seal.
|
Time to fill with oil and test for leaks and oil pressure. |

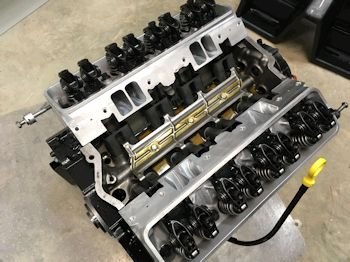
Notice the lifter guides are the new GMPP LS style which
captures the lifters for easy camshaft changes...(no pulling the
intake manifold).
|

Pressure with the drill is 60psig. |

All pushrods oozed oil onto the rockers. The optispark
here is my shop unit and it's being used to fill the hole
during the oil pressure test.
|
The final to-do is to clean up an intake manifold and fit that on and then deliver
the engine to Nabil Guffey for installation. |
Close up photo of the lifter guides that are psudo LS
style. They allow a camshaft swap without removing the intake
manifold.
|

Close up of the CNC porting by Advanced Induction. |

One more view of the intake valley.
|

Test fitting of the intake with the FelPro gasket. I
make sure the bolts line up prior to putting RTV on the
manifold. If the block is decked then the manifold may need
to have the bolt holes elongated. |

These are the shop valve covers that I use for dyno sessions and
photo sessions. Donated by Stan.
|
 |

Installing final items: Professional Products hub and
damper #80030. Here is the hub which is universal to all LT1
cars, (Corvette and Camaro and Impala SS).
|

If you have a B-body Impala SS you add the aluminum spacer. |

Then bolt on the damper with longer bolts.
|

Here is the TCI neutral flexplate #399174 |