|
This engine is to go in a wagon with a mild
blower. I'm calling it ERE-383 #5. It's really a
replacement for the broken ESE-383 #5 which was built early 2006 and
failed during testing. The Sealed Power hyper pistons
broke. Here is a link to the build and testing of ESE-383 #5
to refresh your memory [LINK]
We decided to upgrade the engine and use good quality Mahle pistons
and Compstar rods and the Callies Dragonslayer crankshaft.

Here is the Callies Speed Pack with upgrade from the Compstar
crankshaft to the Dragonslayer. This kit includes a fully
balanced rotating assembly with Compstar H-beam rods, Mahle -16cc
dished piston with Mahle rings, pins and locks and ACL race
bearings. I sell these kits with the Compstar crank for $1980
and $2345 with the Dragonslayer upgrade.

Here is the block which has been align honed and fit for splayed
Eagle main caps. I also smoothed the external surfaces of the
block to make it ready for POR-15 gloss black engine paint.

Here is the Dragonslayer set in the block and getting ready to
measure main bearing clearance.

Here the main caps are on. Stock caps are at #1 and #5 and
Eagle splayed caps are at #2, 3, 4 with ARP studs. Main
bearing clearance is from .002 to .0025"
Assembly
October 15th,
2006
Rod bearing clearance measuring.

1st thing, use the rod-vise and unbolt the rod cap

Then get the cap off with your rod-splitter tool.
Don't hammer.

Insert ACL rod bearings onto rods.

Measure every rod journal..(all at 2.0999 to 2.1000)

Then zero out the bore gauge to the 2.1000 mic reference.

Then measure the rod with bearings and caps torqued to 75ft-lb.

They measure from .0015" to .0020" at various points.
More
assembly and parts detail. October 25th,
2006
Bone stock GM LT4 heads with stock pushrods and 1.6 ratio GMPP
roller rockers. They fit nicely without much trouble.

Here is a photo of the as-cast LT4 intake runner.

And now with Bob Nobles very nicely powder coated LT4 intake.
You can see the LT4 red inside.
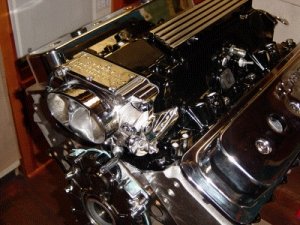
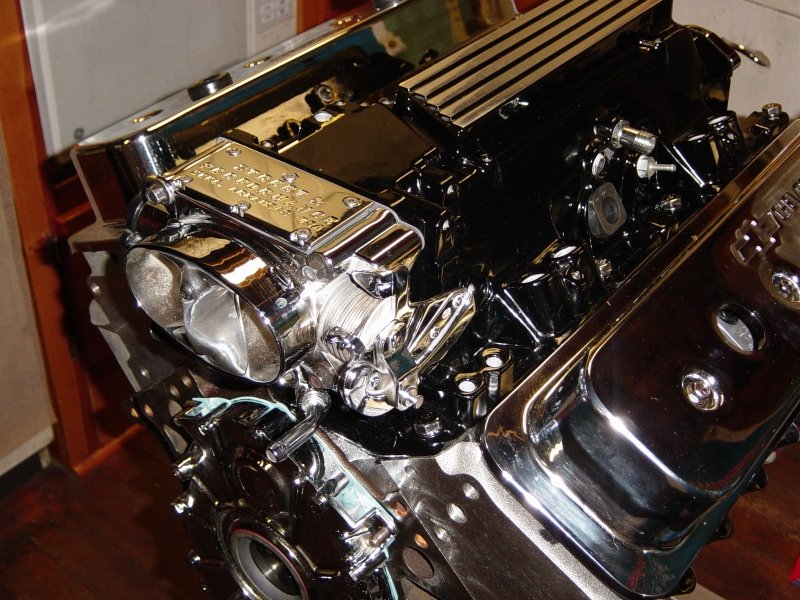
And very hard to photograph, chrome timing cover and chrome Street
and Performance stock throttle body. The valve covers are mine
and are used here temporarily.
|
Assembly and parts detail. October 14th,
2006 
Here is the broken #4 piston from "street" engine
#5. It's a cast hypereutectic piston from Speed Pro.
This broke during the testing and break-in of ESE#5. I don't
think I'll be using these Speed Pro pistons anymore.

I start out by file fitting the Mahle piston rings. 1st ring
at .020" and 2nd ring at .024". This is a mild
blower application.

After filing all the rings I leave them in their respective cylinder
bores until it's time to install the pistons.

I assembled all of the piston/rod pairs. The Mahle pistons use
a round wire lock for the pin and the rings are file fit with
standard tension oil control rings.

A good look at the Mahle piston with superior quality piston
rings. This is a -16cc inverted dome piston and it's being
used here to lower compression ratio for the blower. The rod
is a 6.0" H-beam.

And another look.
The Compstar H-beam rod is all the rave these days because it's
affordable and as good as many $1000+ rods, (although it is made in
China). Callies engineered it and it's stress relived so that
it wont twist or change shape on the big end during assembly. The
engine builder, (me), can put it right in without any extra finish
work. You can see it also has great stroker clearance for cam
and block.
Assembly
October 15th,
2006
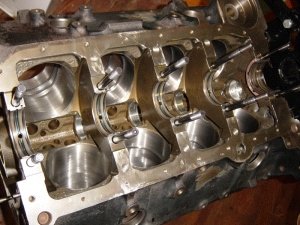
Piston/rod install onto bock.

Piston and rod insertion with ARP tool

2, 4, 6, 8 in

All pistons/rods in but not torqued.
Some rods need more block clearance so I have to tackle that before
proceeding.
10-15-06:
more stroker clearancing and heads/cam install

Removed the pistons and the crank in order to grind on the block for
stroker clearance. Thankfully this doesn't take a lot of time.

The red marks are my grinding guides. I'll use a stone wheel
and my Dremel tool.

Block is outside and the towel is just to reduce the amount of junk
build up. I washed the block with soap and water and block
brushes after grinding.

Back in the shop with a clean, dry and oiled block. Click the
thumbnail photo for the larger photo and you can see the additional
grinding.

Crank, rods and pistons back in and torqued. Now it's final
assembly time. This is Joe's LT4 Hot cam.

And a Cloyes timing set with ARP cam gear bolts.

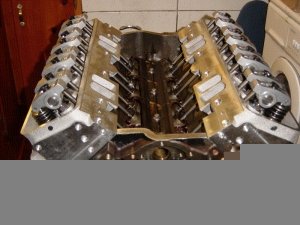
Nice looking GM LT4 heads with a Bob Noble powder coated gloss black
LT4 intake.

Impala .029" gasket on.

Left head on and torqued.

Right head on and torqued.
|