Tear-down inspection: Intake looks fine.
|

No metal in the valey
|

Heads look fine.
|

|

Nice valve springs and titanium retainers
|

Adjustable pushrod guides. All very nice.
|

Cylinders #5 and #7 look to be fuel washed.
|

|
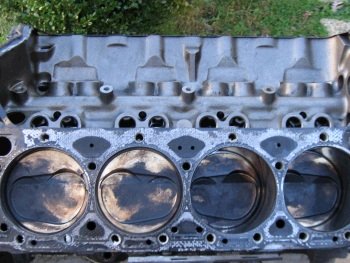
The passenger side looks ok, (at 1st glance)
|

Passenger side.
|
Driver's side.
|

Oil pan...has lots of thin slivers of metal from the water pump
drive gear.
|

Most likely some of that metal made it to the bearings.
|

|

|

|

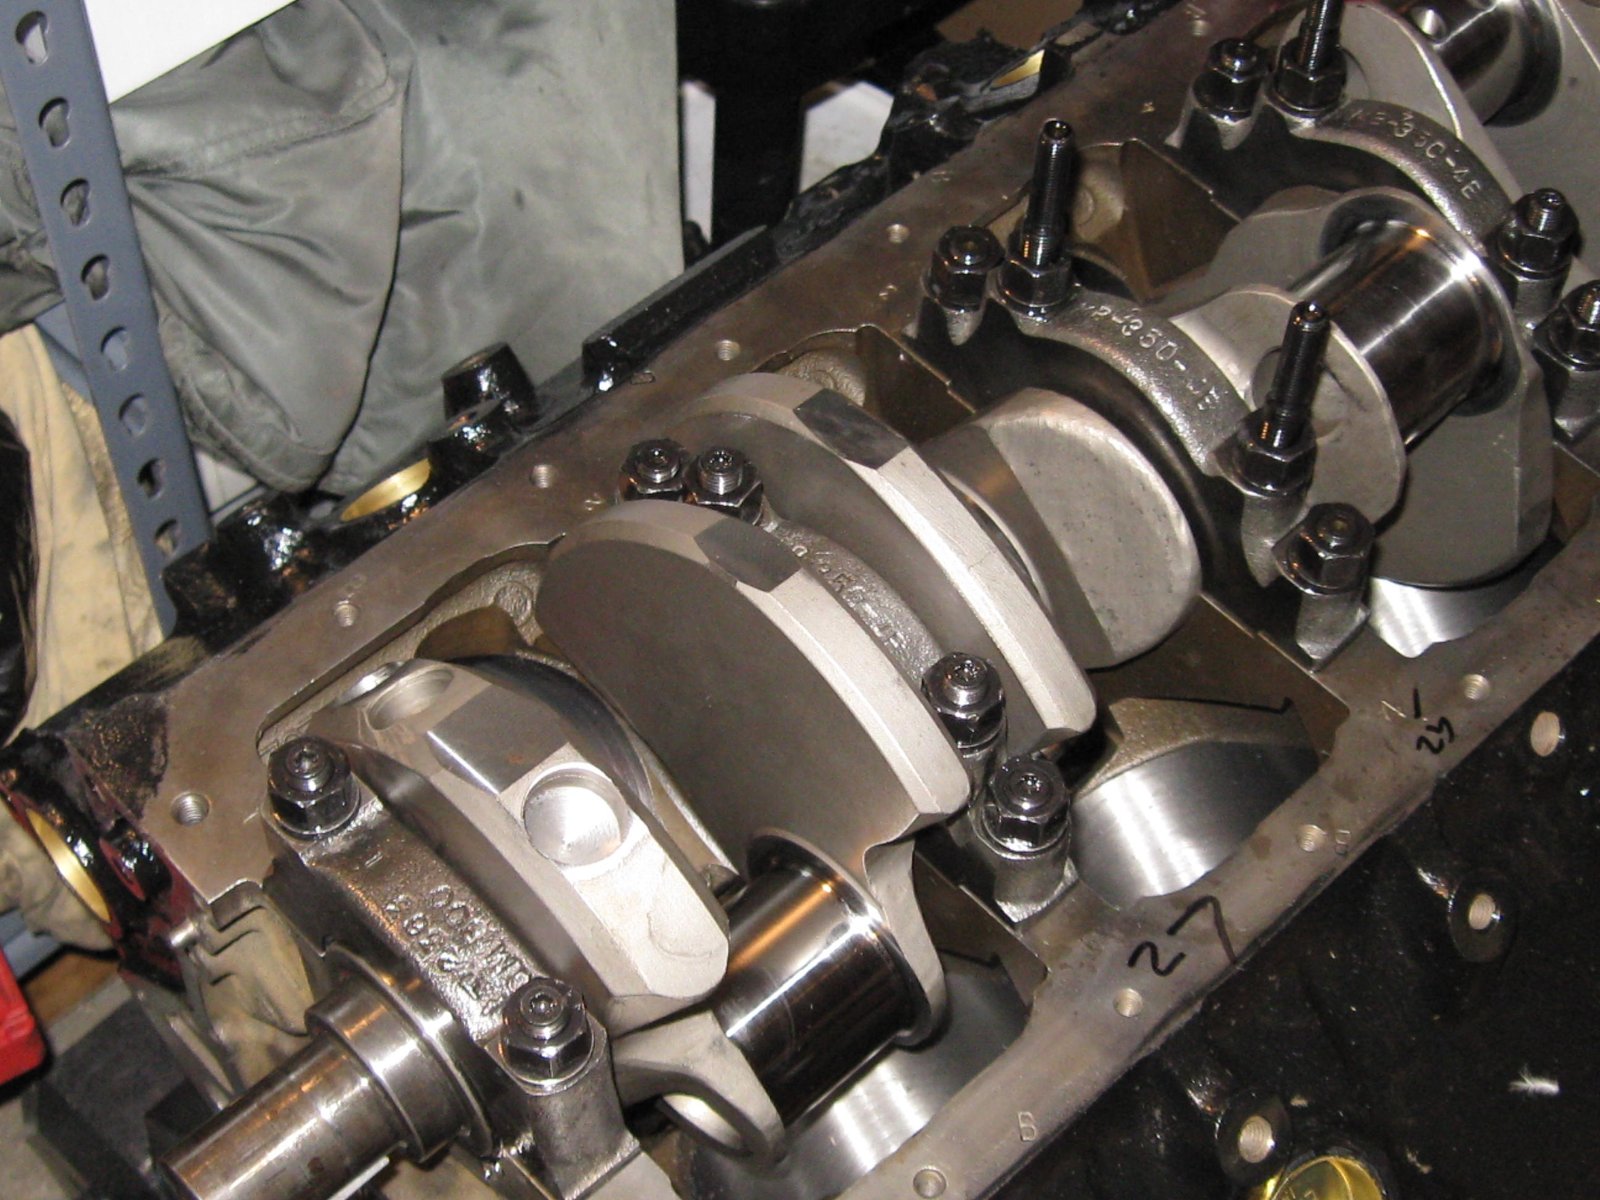
Rod bearings debris damaged.
|

debris lines in the rod journals, (and mains).
|

Manley piston #593640 with -14.5cc inverted dome and 2618 Alloy.
|

This is a 4.040" pistons with.043", .043", 3mm rings.
|

Look close and you can see the flat spot on the water pump drive
gear.
|

Also, the front oil gallery plugs did not have oil cooling holes
which if they did...may have helped the timing gear to live longer..
|

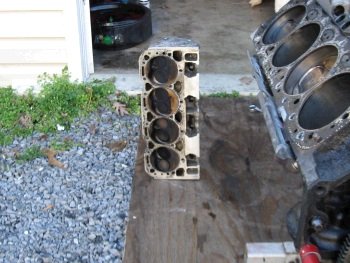
The cylinder bores were ok.
|

Main bearings.
|

|

|

Eagle 3.75" stroker crank
|

|
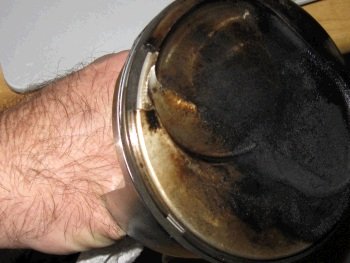
It wasn't until later that I noticed #8 piston had melted.
|

Old piston weight 362g. Same as new piston.
|

Thread tap the oil galleries.
|

Block ready for paint and brass freeze plugs.
|

The machine shop did a torque plate hone and noticed that the bores
were distorted at the top. You can see the darker spots at the
bolt-holes.
|

POR15 engine black.
|

|

|

Cleaned are ready for ring filing.
|

Total Seal. Top ring is gapless, 2nd ring is napier.
|

Top ring at .030" and 2nd at .026"
|

This is a gapless 1st ring.
|

|

|

I have to widen the oil hole in the bearing to fit the block.
The fuzz you see is paper towel fuzz not metal shavings.
|

The crank was ground and polished .010" under.
|

Main clearance is .0027, .0027, .0025, .0030, .0030"
|

The best timing set money can buy.
|

Crank sprocket installed at Zero.
|

#1 piston/rod installed to degree the cam shaft.
|

106 deg intake center line and the GM 847 cam card spec is 107.
|

Rod bearing clearance all a .0025"
|

The ring install was the most delicate and tricky I have ever
encountered. I compressed them with the black tool you see
here and then used a 4.040" tapered ring compressor. The
oil rings wanted to fall out of their grooves and that would not be
a good thing if they were installed like that.
|

|

|

Here is the bottom end with new windage tray. I believe all
LT1's can benefit from the stock windage tray. Rod bolts are at
.005" stretch. Rod side clearance is .028" and that is
very high but good oil pressure will make that ok.
|

Oil pan disassembled for cleaning.
|

The pan had a lot of hidden metal slivers.
|

|

Oil pan on without RTV so that I can test if there is interference.
|

Now oil pan gasket gets RTV top and bottom.
|

This pan needs RTV because there are only 3 bolts per side due to
the "stroker clearance".
|

.026" head gaskets.
|

|

Refurbished heads. They were slightly decked and new valve
springs and valve job cleaned up.
|

These are new Comp 26918-16 and reused Ti retainers and reused
keepers. The machine shop said the old springs were very much
worn out.
|

All head bolts carefully torqued
|

|

|

New front seals. The water pump hole has a Kennedy half
dollar.
|

Almost ready to be installed.
|

I always try to have the passenger side headers pre-installed.
|

My garage is full so I had to use my race car trailer as an
alternate garage.
|

Injectors are going to be looked at to see if they leak when at
pressure.
|

|

That oil filter will be changed out after installation but this old
one can be bumped and dinged without worry.
|

New rear main seal and then the
flexplate was installed.
|

|
|

|

Installing electric water pump. Notice that this is an Fbody
pump. I didn't realize that at 1st.
|

|

After installing the Fbody pump it was easy to figure out that the
fittings were in the wrong spot. D*oh. So I put the
Meziere in the original Bbody pump.
|